Building an Expanding Image Background with HTML, CSS and Vanilla JavaScript
Still on the 20 days JavaScript Challenge, I built an Expanding Image Background App with HTML, CSS and Vanilla JavaScript and in this article I will explain how I built this app. I hope you learn a lot from it because the explanation will be very detailed and links to relevant sources would be mentioned.
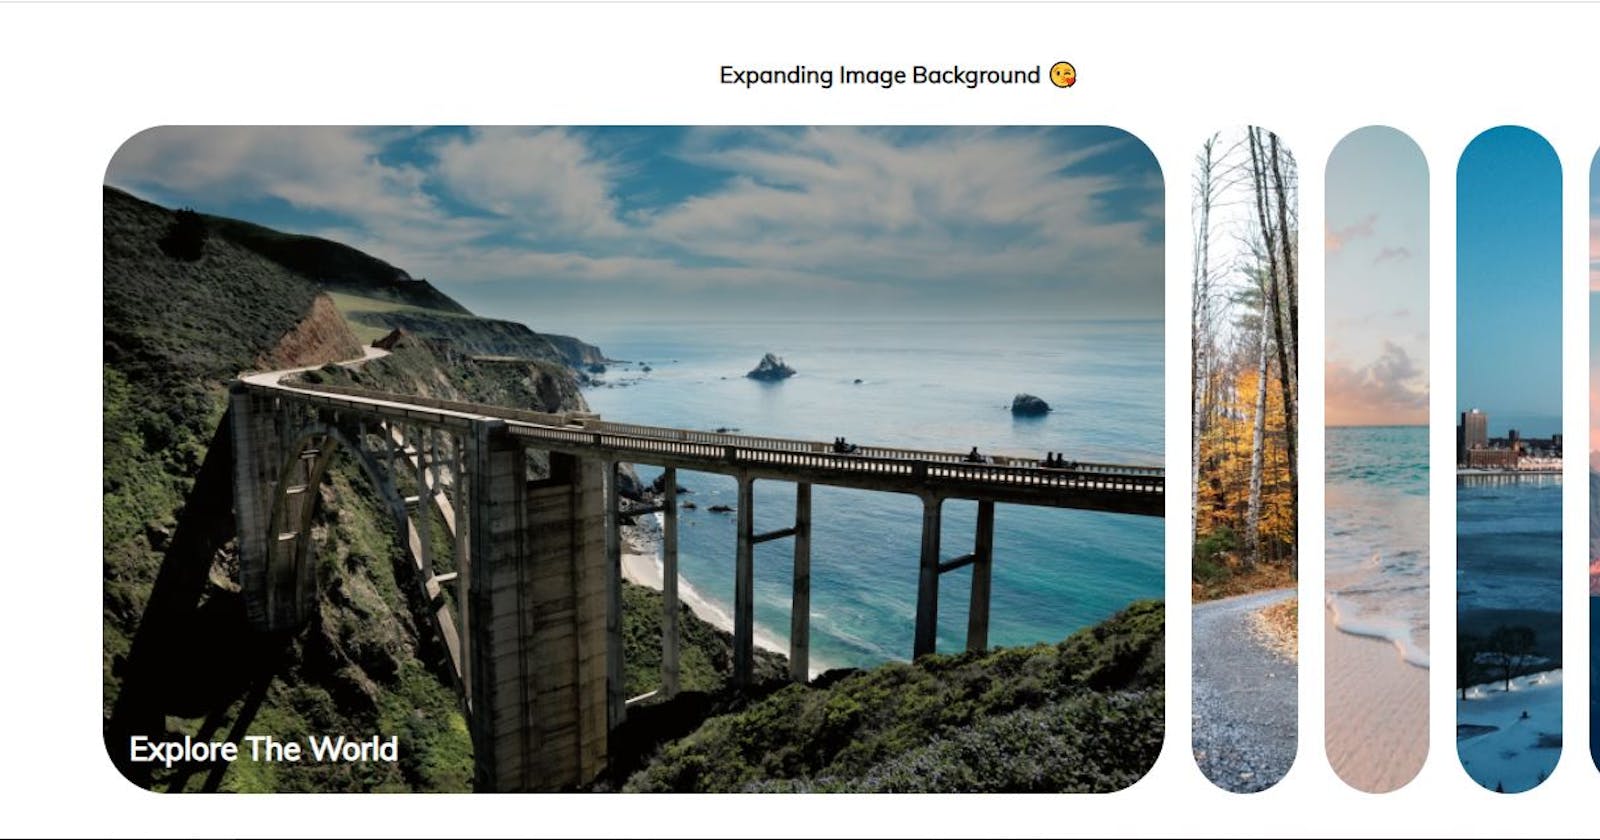
I will like to start by explaining how this web app works so that it would be easier to understand the implementation of the app. When a user clicks on a particular image on the user interface it expands and increase in size and it covers the main view of the page. This concept can also be used when building an Image viewer app. So let's go on to see how this amazing app was built😜.
My series of articles on the JavaScript Challenge has always been divided into 3 parts which is the HTML Structure and the content, then the CSS Styling and the main brain of the app which is the JavaScript Functionality. The reason for this splitting is so that the way the app functions will be well known and there would be good understanding of how these three parts works together.
The Three major building blocks of this app are the;
- HTML Structure.
- CSS Styling and,
- The major brain which is the JavaScript Functionality.
HTML Structure
The Content of this web app consist of the images we are using and the captions for the different images, and these images were gotten from unsplash. The purpose of HTML as I say in all my articles is so that the page will have structure like the skeleton of a human being. If you can imagine the importance of a skeleton in a body then you can know the importance of HTML.
Below is a code snippet that shows the way the HTML code was written and it is very clean and easy to understand;
<!DOCTYPE html>
<html lang="en">
  <head>
    <meta charset="UTF-8" />
    <meta name="viewport" content="width=device-width, initial-scale=1.0" />
    <link rel="stylesheet" href="style.css" />
    <title>Expanding Cards</title>
  </head>
  <body>
    <h3>Expanding Image Background 😘</h3>
    <div class="container">
      <div
        class="panel active"
        style="
          background-image: url('https://images.unsplash.com/photo-1558979158-65a1eaa08691?ixlib=rb-1.2.1&ixid=eyJhcHBfaWQiOjEyMDd9&auto=format&fit=crop&w=1350&q=80');
        "
      >
        <h3>Explore The World</h3>
      </div>
      <div
        class="panel"
        style="
          background-image: url('https://images.unsplash.com/photo-1572276596237-5db2c3e16c5d?ixlib=rb-1.2.1&ixid=eyJhcHBfaWQiOjEyMDd9&auto=format&fit=crop&w=1350&q=80');
        "
      >
        <h3>Wild Forest</h3>
      </div>
      <div
        class="panel"
        style="
          background-image: url('https://images.unsplash.com/photo-1507525428034-b723cf961d3e?ixlib=rb-1.2.1&ixid=eyJhcHBfaWQiOjEyMDd9&auto=format&fit=crop&w=1353&q=80');
        "
      >
        <h3>Sunny Beach</h3>
      </div>
      <div
        class="panel"
        style="
          background-image: url('https://images.unsplash.com/photo-1551009175-8a68da93d5f9?ixlib=rb-1.2.1&ixid=eyJhcHBfaWQiOjEyMDd9&auto=format&fit=crop&w=1351&q=80');
        "
      >
        <h3>City on Winter</h3>
      </div>
      <div
        class="panel"
        style="
          background-image: url('https://images.unsplash.com/photo-1549880338-65ddcdfd017b?ixlib=rb-1.2.1&ixid=eyJhcHBfaWQiOjEyMDd9&auto=format&fit=crop&w=1350&q=80');
        "
      >
        <h3>Mountains - Clouds</h3>
      </div>
    </div>

    <script src="script.js"></script>
  </body>
</html>
CSS Styling
CSS can be likened to the flesh of a human being, much more than the skeleton we need flesh so that we can be presentable and interact with our environment. The Styling, Colors, nice Font and aligning of this app was achieved by using CSS. One of the major CSS properties used in this app is Flexbox and it is a really good property that can be used to layout and alignment of content without using floating or positioning.
Below is the code snippet that explains how the CSS was used to style the page;
@import url("https://fonts.googleapis.com/css?family=Muli&display=swap");

* {
  box-sizing: border-box;
}

body {
  font-family: "Muli", sans-serif;
  display: flex;
  flex-direction: column;
  align-items: center;
  justify-content: center;
  height: 100vh;
  overflow: hidden;
  margin: 0;
}

.container {
  display: flex;
  width: 90vw;
}

.panel {
  background-size: cover;
  background-position: center;
  background-repeat: no-repeat;
  height: 80vh;
  border-radius: 50px;
  color: #fff;
  cursor: pointer;
  flex: 0.5;
  margin: 10px;
  position: relative;
}

.panel h3 {
  font-size: 24px;
  position: absolute;
  bottom: 20px;
  left: 20px;
  margin: 0;
  opacity: 0;
}

.panel.active {
  flex: 5;
}

.panel.active h3 {
  opacity: 1;
  transition: opacity 0.3s ease-in 0.4s;
}

@media (max-width: 480px) {
  .container {
    width: 100vw;
  }

  .panel:nth-of-type(4),
  .panel:nth-of-type(5) {
    display: none;
  }
}
The Brain Behind Our App
Now let's learn how to build what makes the ui functional and interactive, like from our example earlier Human beings don't just have Skeleton and Flesh but one characteristics of Human Being is the ability to move from one place to another. So the purpose of using JavaScript is to make it functional.
The Functionality is very specific and not too long, Firstly is to get the class name of the image by using a document.querySelectorAll() and then use some JavaScript methods and the ones we are using are the addEventListener() and the classList(). So we set an onClick event listener that expands the image by calling a class name called active.
In this case we are having two functions, one is to add the class name and the other is to remove the class name from the image.
Check below for the code snippet and it is very easy to understand;
const panels = document.querySelectorAll(".panel");

panels.forEach((panel) => {
  panel.addEventListener("click", () => {
    removeActiveClasses();
    panel.classList.add("active");
  });
});

function removeActiveClasses() {
  panels.forEach((panel) => {
    panel.classList.remove("active");
  });
}
With this code snippet, onClick of the image it adds the class name called "active" then expands the image. and with the CSS we added a transition and makes it more user friendly.
Conclusion
This web app is very short and fast to build, it is just to have a good understanding of some CSS and JavaScript concepts. I really enjoyed the building of this app because it is really cool and fun. You can get the source code of this web app here and the hosted link on netlify by clicking here .
Thanks for reading through...
